This feature is only available on Business plans and above.
Dub's powerful attribution platform lets you understand how well your links are translating to actual users and revenue dollars.

In this guide, we'll learn how to track conversion events with Dub using client-side tracking.
Client-side conversion tracking comes with the following limitations:
- Ad blockers – Users with ad blockers may prevent tracking scripts from loading.
- JavaScript disabled – Events won’t be tracked if users have JavaScript disabled.
- Network issues – Failed network requests won’t retry automatically.
- Privacy concerns – Some users may block client-side tracking for privacy reasons.
For more accurate conversion tracking, consider using server-side conversion tracking.
Step 1: Enable conversion tracking for your links#
First, you'll need to enable conversion tracking for your Dub links to be able to start tracking conversions:
If you're using Dub Partners, you can skip this step since partner links will have conversion tracking enabled by default.
Option 1: On a workspace-level
To enable conversion tracking for all future links in a workspace, you can do the following: To enable conversion tracking for all future links in a workspace, you can do the following:
- Navigate to your workspace's Tracking settings page.
- Toggle the Workspace-level Conversion Tracking switch to enable conversion tracking for the workspace.
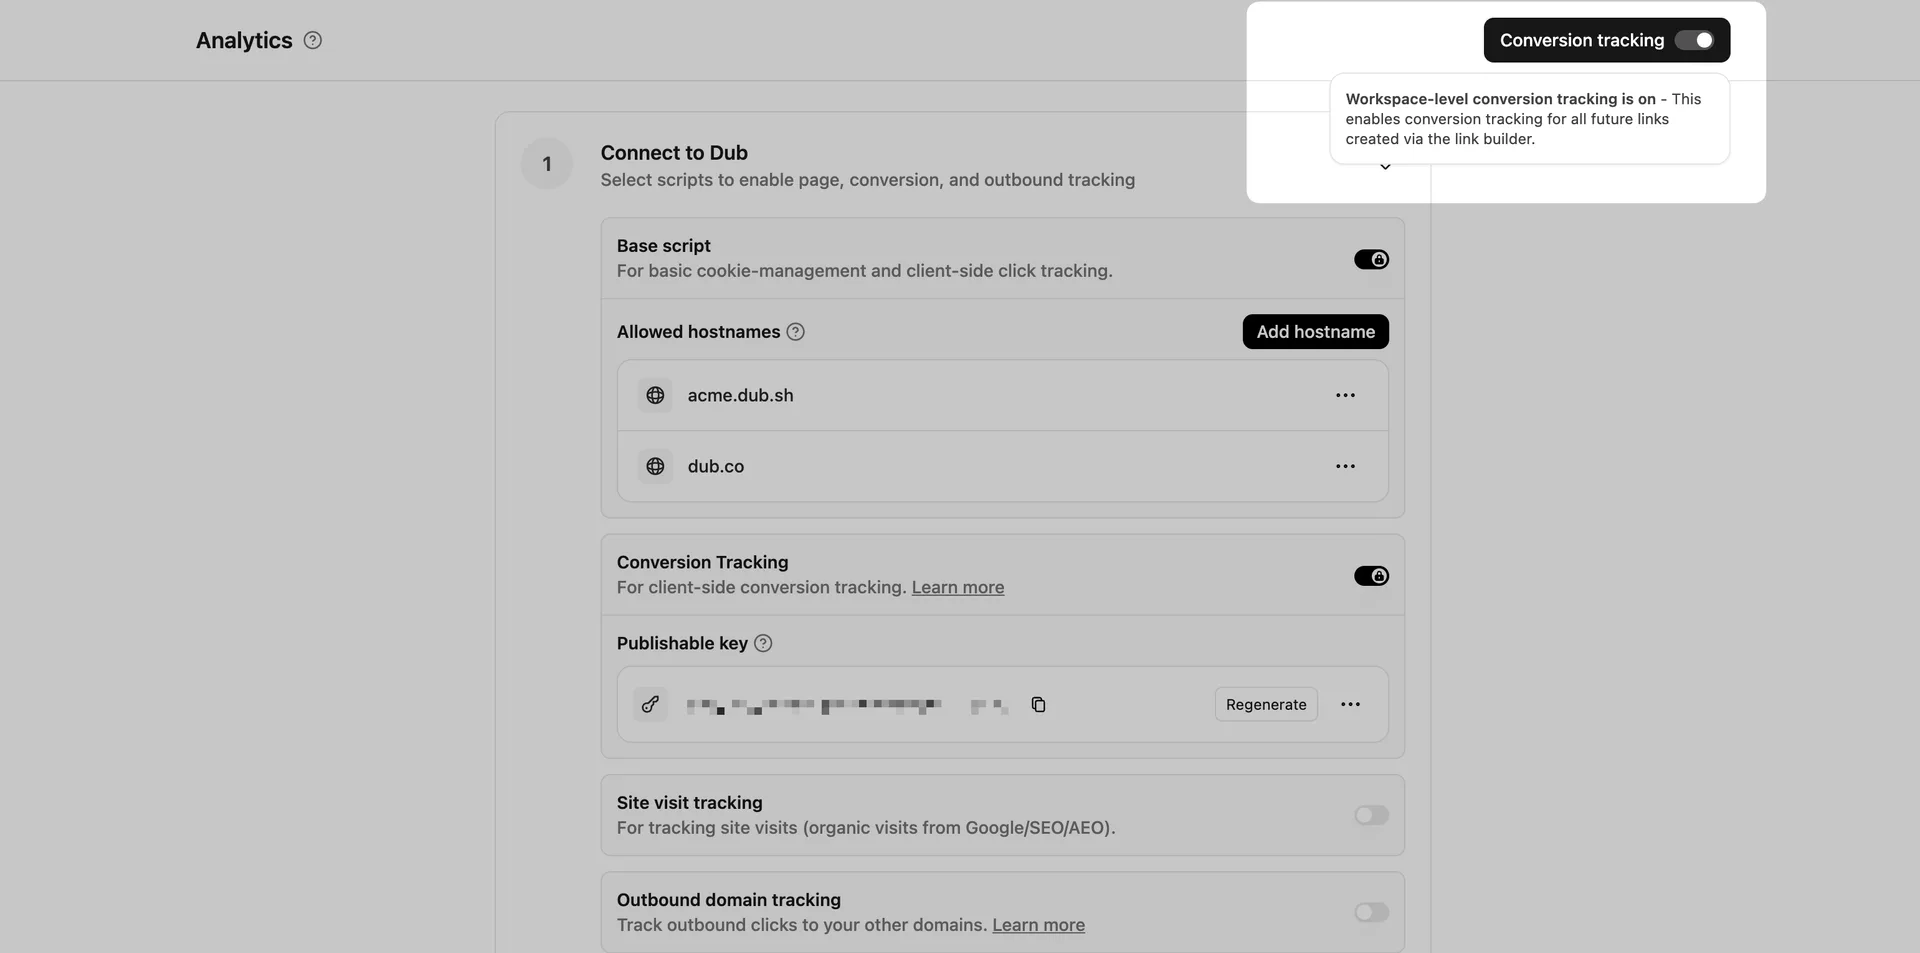
This option will enable conversion tracking in the Dub Link Builder for all future links.
Option 2: On a link-level
If you don't want to enable conversion tracking for all your links in a workspace, you can also opt to enable it on a link-level.
To enable conversion tracking for a specific link, open the Dub Link Builder for a link and toggle the Conversion Tracking switch.
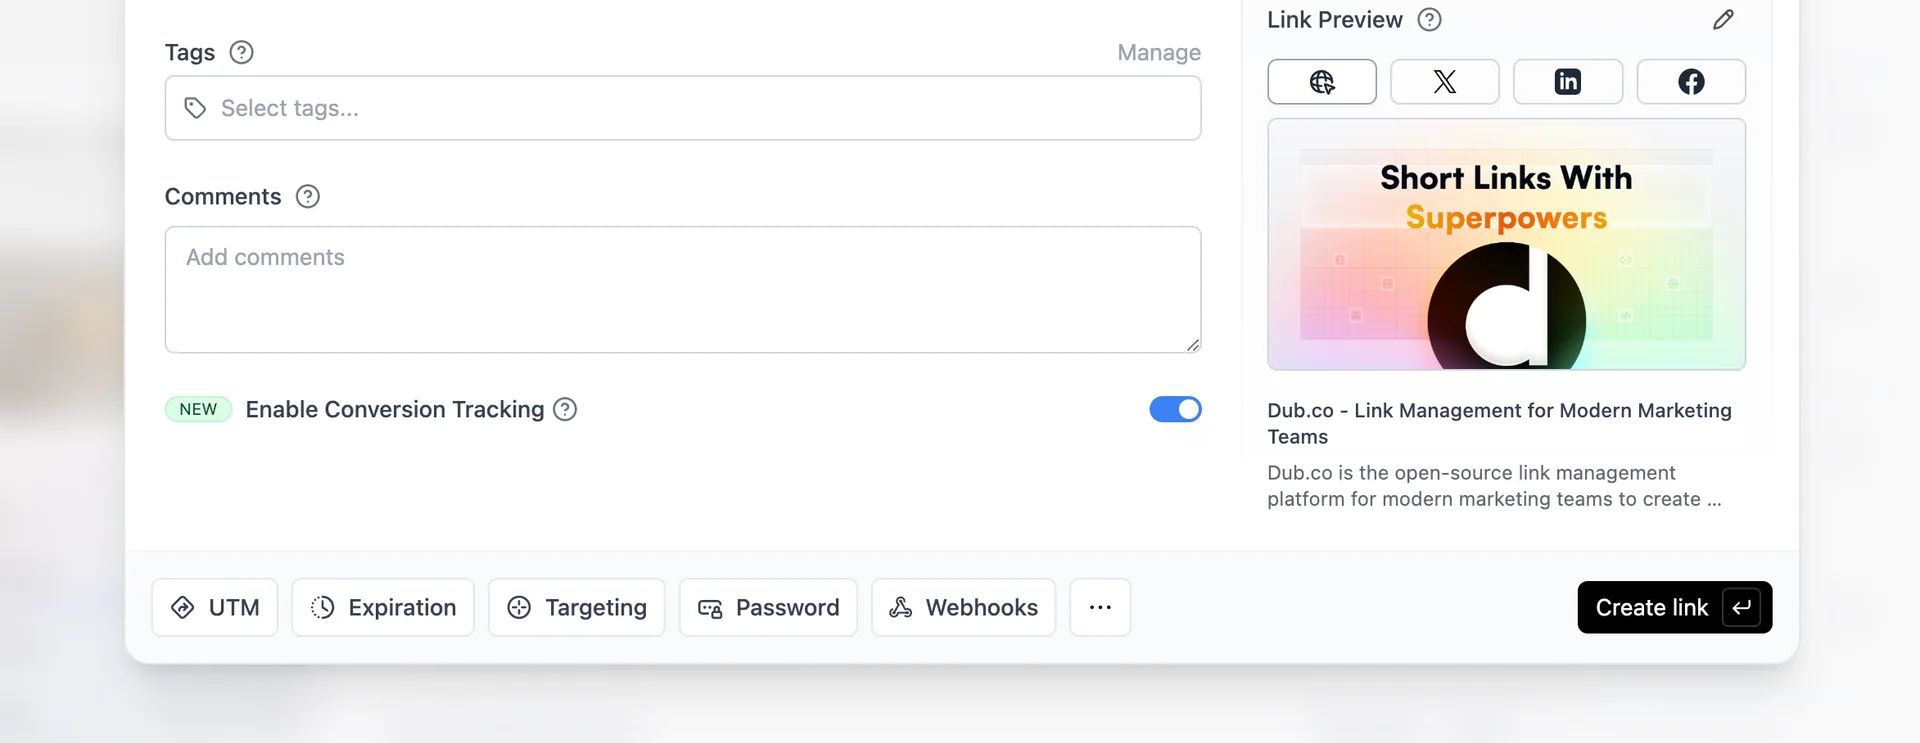
You can also use the C keyboard shortcut when inside the link builder to
quickly enable conversion tracking for a given link.
Option 3: Via the API
Alternatively, you can also enable conversion tracking programmatically via the Dub API. All you need to do is pass trackConversion: true when creating or updating a link:
Step 2: Install the Dub Analytics script#
Then, you'll need to install the Dub Analytics script and set up the necessary configuration for client-side conversion tracking:
Allowlist your site's domain
Then, you'll need to allowlist your site's domain to allow the client-side conversion events to be ingested by Dub.
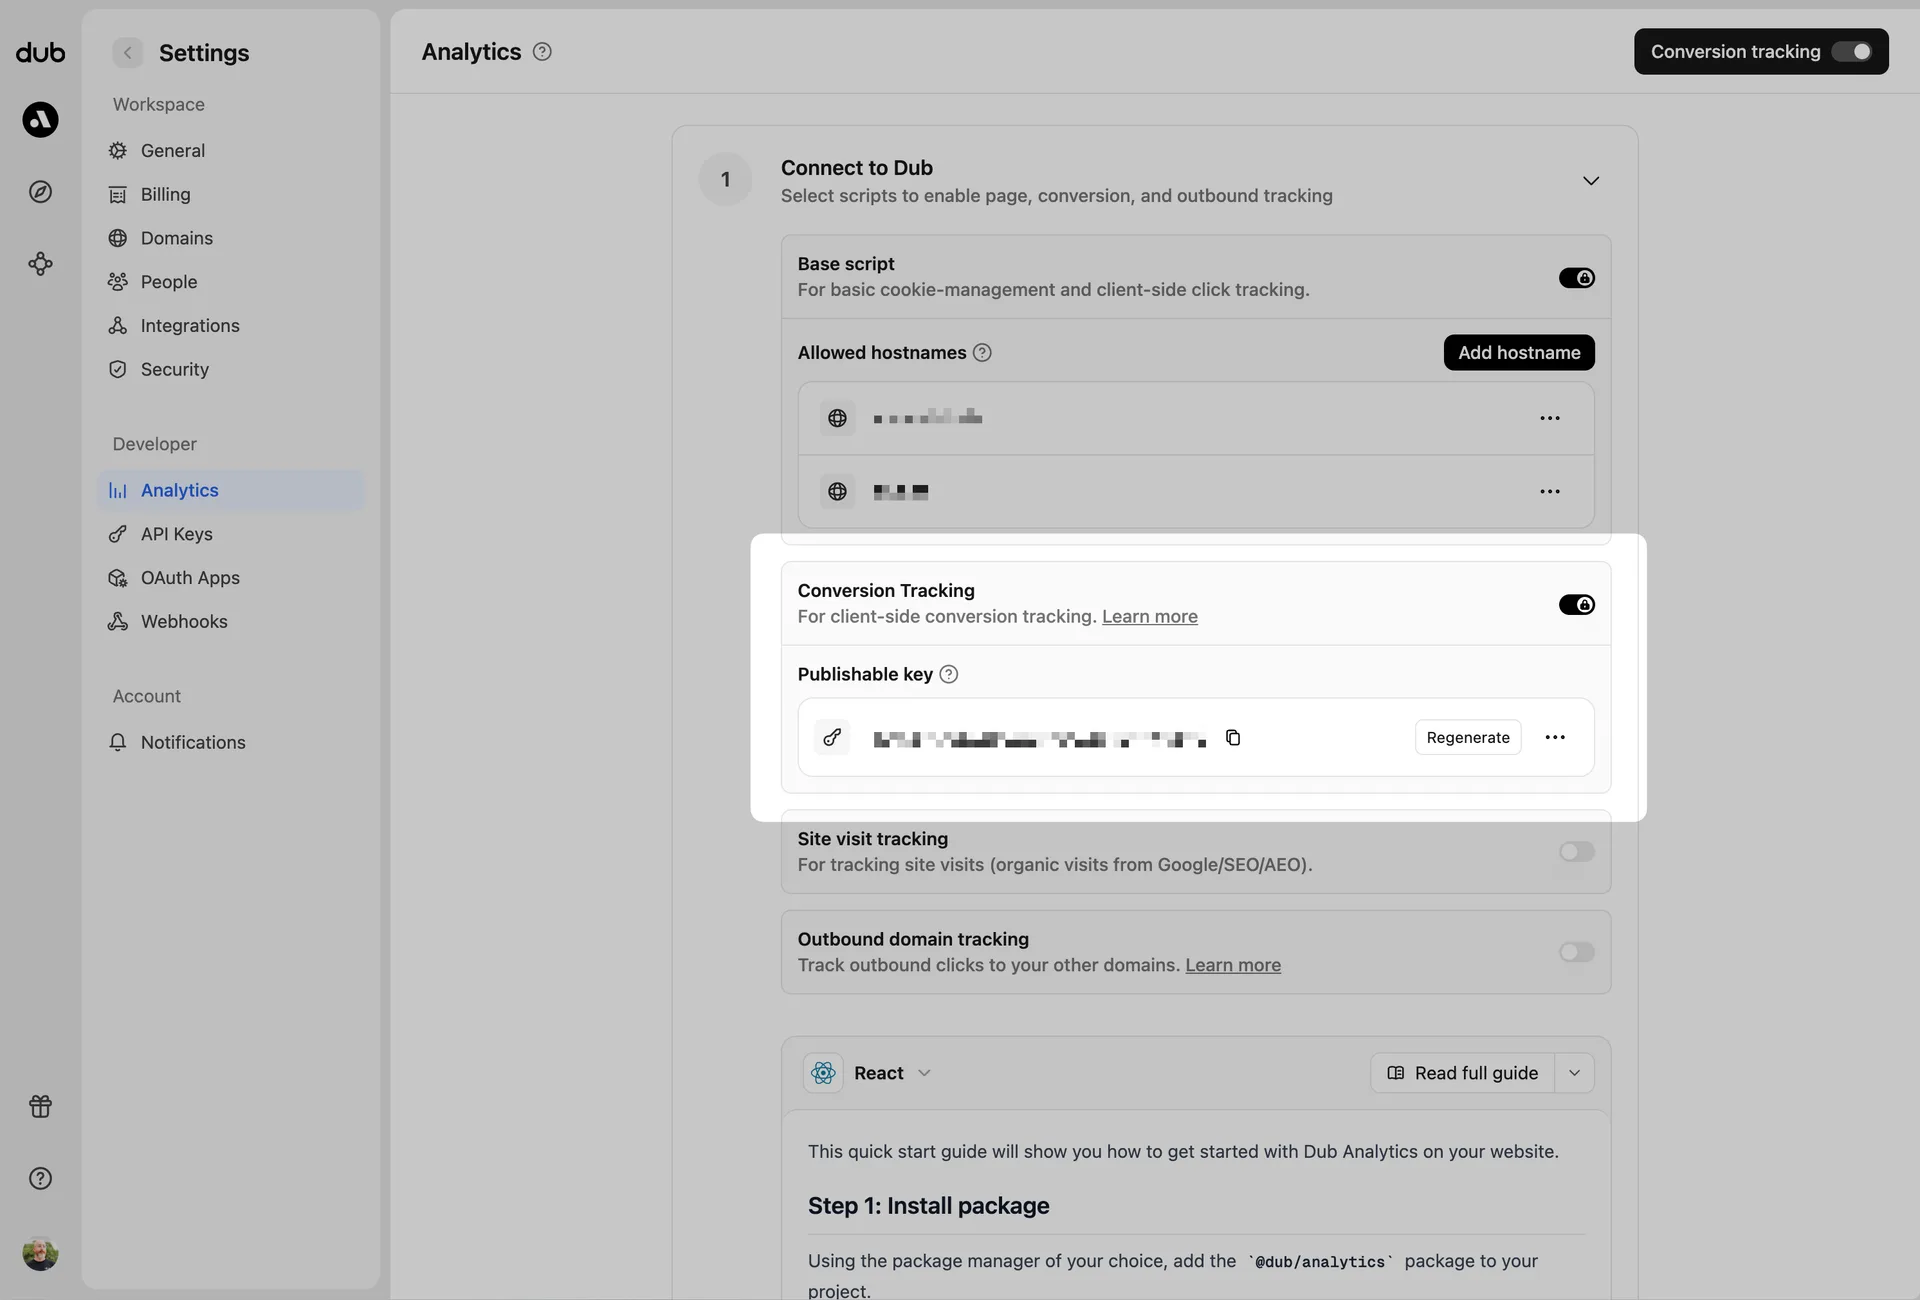
To do that, navigate to your workspace's Tracking settings page and add your site's domain to the Allowed Hostnames list.
This provides an additional layer of security by ensuring only authorized domains can track conversions using your publishable key.
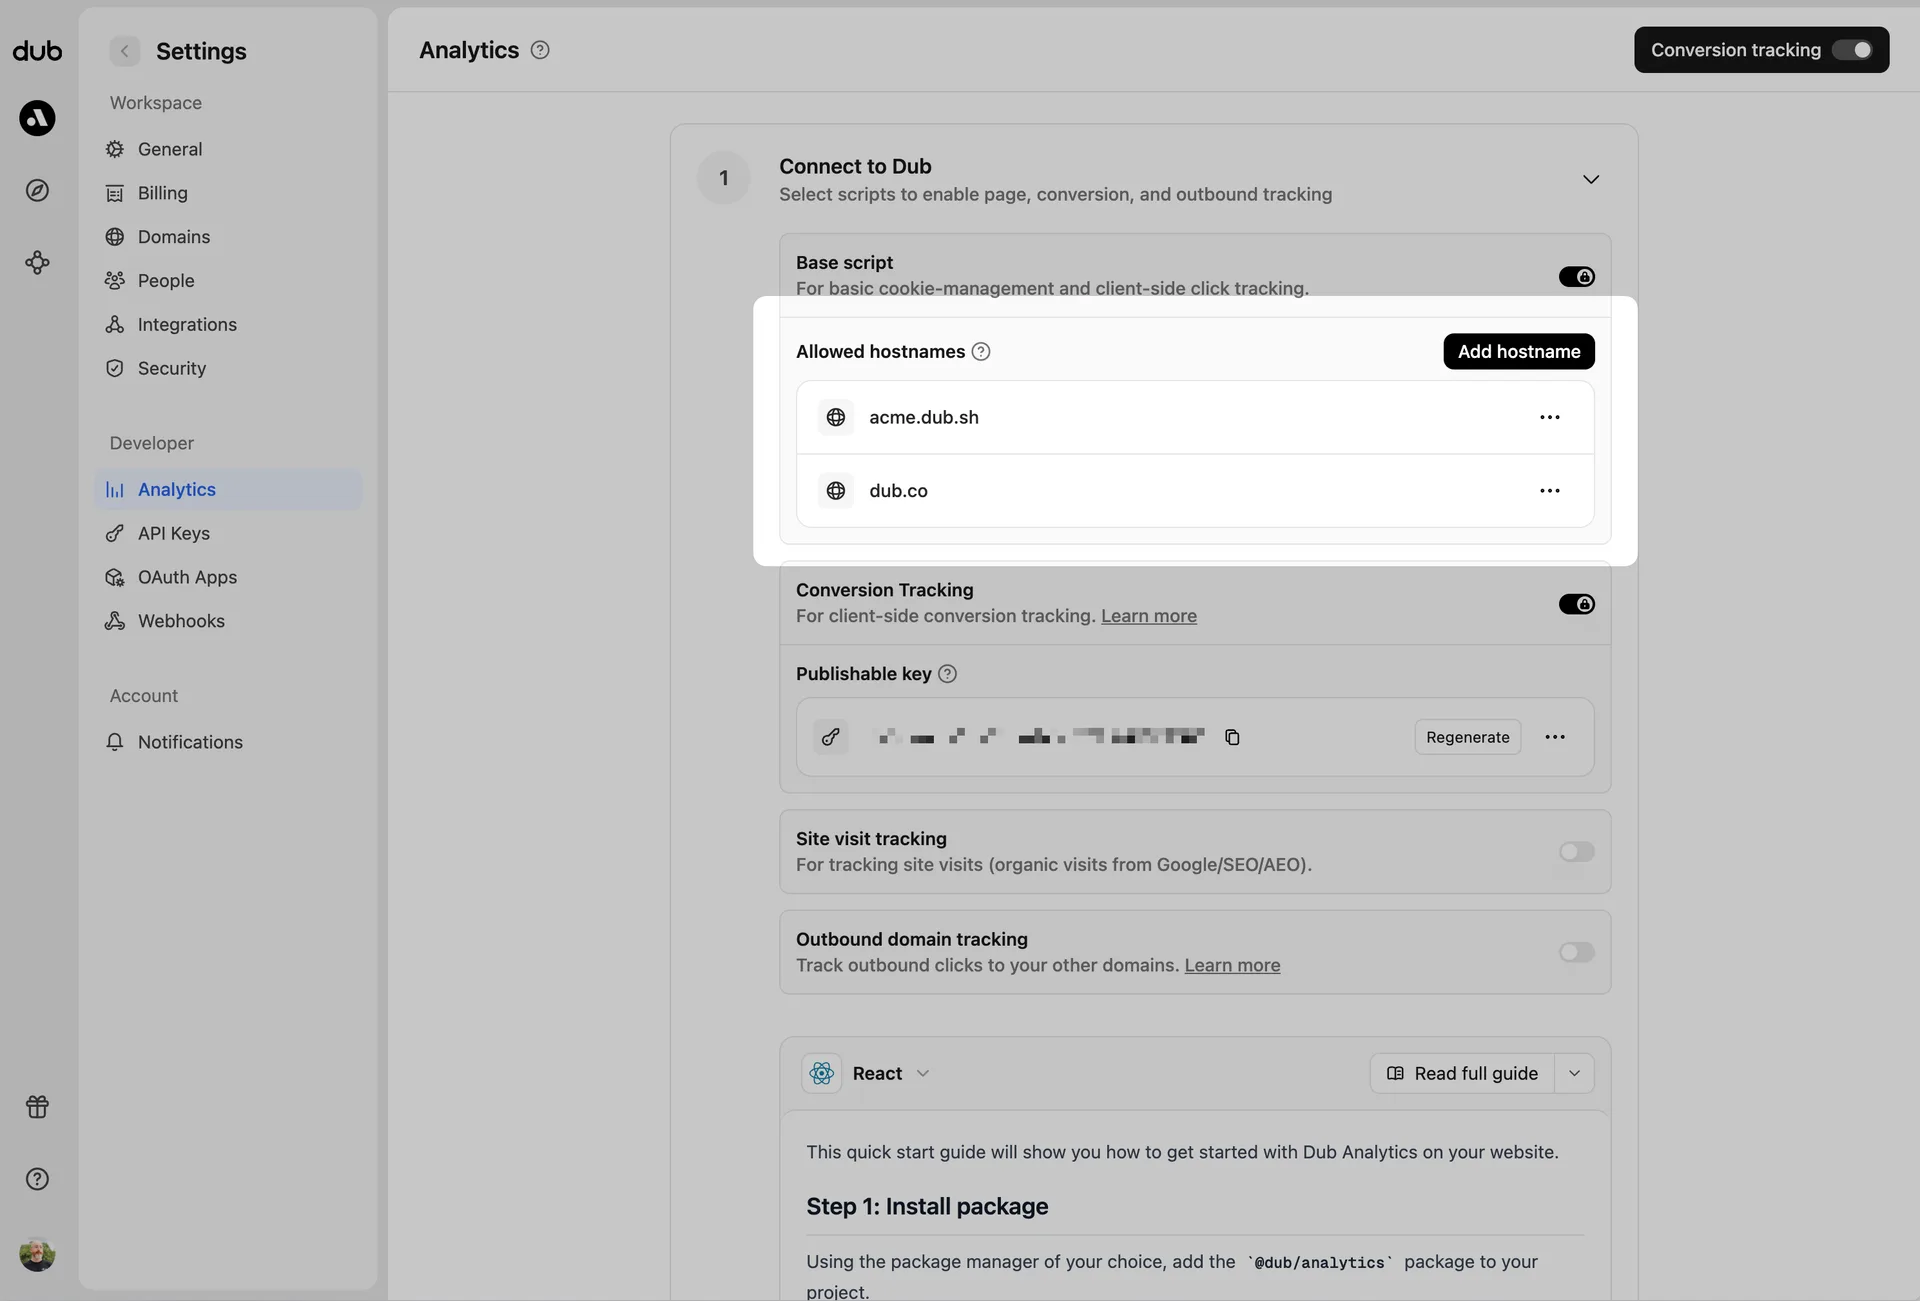
You can group your hostnames when adding them to the allow list:
example.com: Tracks traffic only fromexample.com.*.example.com: Tracks traffic from all subdomains ofexample.com, but not fromexample.comitself.
When testing things out locally, you can add localhost to the Allowed
Hostnames list temporarily. This will allow local events to be ingested by
Dub. Don't forget to remove it once you're ready to go live!
Generate your publishable key
Before you can track conversions on the client-side, you need to generate a publishable key from your Dub workspace.
To do that, navigate to your workspace's Tracking settings page and generate a new publishable key under the Publishable Key section.
Install Dub Analytics script
Next, install the Dub Analytics script on your website/web application.
You can install the Dub Analytics script in several different ways:
You must configure the publishable key you generated in step 1 when installing the analytics script. Without this key, client-side conversion tracking will not work.
Step 3: Track lead events#
Looking to track sales without a prior lead event? Check out our direct sale tracking guide.
Once the analytics script is installed, you can start tracking lead events in your application on the client-side.
Track leads from URL query parameters (recommended)#
If you redirect users to a thank-you page after a successful action, you can track leads by reading query parameters from the URL.
Track leads from form submissions#
You can also track leads directly when users submit a form on your website.
Here are the properties you can include when sending a lead event:
| Property | Required | Description |
|---|---|---|
clickId | Yes | The unique ID of the click that the lead conversion event is attributed to. You can read this value from dub_id cookie. If an empty string is provided (i.e. if you're using tracking a deferred lead event), Dub will try to find an existing customer with the provided customerExternalId and use the clickId from the customer if found. |
eventName | Yes | The name of the lead event to track. Can also be used as a unique identifier to associate a given lead event for a customer for a subsequent sale event (via the leadEventName prop in /track/sale). |
customerExternalId | Yes | The unique ID of the customer in your system. Will be used to identify and attribute all future events to this customer. |
customerName | No | The name of the customer. If not passed, a random name will be generated (e.g. "Big Red Caribou"). |
customerEmail | No | The email address of the customer. |
customerAvatar | No | The avatar URL of the customer. |
mode | No | The mode to use for tracking the lead event. async will not block the request; wait will block the request until the lead event is fully recorded in Dub; deferred will defer the lead event creation to a subsequent request. |
metadata | No | Additional metadata to be stored with the lead event. Max 10,000 characters. |
When to track leads
You should track lead events after successful user actions such as:
- User registration or account creation
- Newsletter subscription
- Contact form submission
- Demo request or trial signup
- Download of gated content
Ensure the event is triggered only after the backend confirms the action was completed successfully. This guarantees accurate lead data and prevents false or incomplete entries.
Step 4: Track sale events#
Once the analytics script is installed, you can start tracking sale events in your application on the client-side.
Track sales from URL query parameters (recommended)#
If you redirect users to a confirmation page after a successful purchase, you can track sales by reading query parameters from the URL.
Track sales from form submissions#
You can also track sales directly when users complete a checkout form on your website.
Here are the properties you can include when sending a sale event:
| Property | Required | Description |
|---|---|---|
customerExternalId | Yes | The unique ID of the customer in your system. Will be used to identify and attribute all future events to this customer. |
amount | Yes | The amount of the sale in cents. |
paymentProcessor | No | The payment processor that processed the sale (e.g. Stripe, Shopify). Defaults to "custom". |
eventName | No | The name of the event. Defaults to "Purchase". |
invoiceId | No | The invoice ID of the sale. Can be used as a idempotency key – only one sale event can be recorded for a given invoice ID. |
currency | No | The currency of the sale. Defaults to "usd". |
metadata | No | An object containing additional information about the sale. |
clickId | No | [For direct sale tracking]: The unique ID of the click that the sale conversion event is attributed to. You can read this value from dub_id cookie. |
customerName | No | [For direct sale tracking]: The name of the customer. If not passed, a random name will be generated. |
customerEmail | No | [For direct sale tracking]: The email address of the customer. |
customerAvatar | No | [For direct sale tracking]: The avatar URL of the customer. |
When to track sale
Track sale events only after a user successfully completes a purchase or payment-related action, such as:
- Completing a checkout or order
- Subscription payment
- Invoice payment
- Any paid trial or demo conversion
Ensure the event is triggered only after the backend confirms the payment was successful. This guarantees accurate sale data and prevents false or incomplete entries.
Looking to track refunds? Check out our refunds tracking guide.
Step 5: View your conversions#
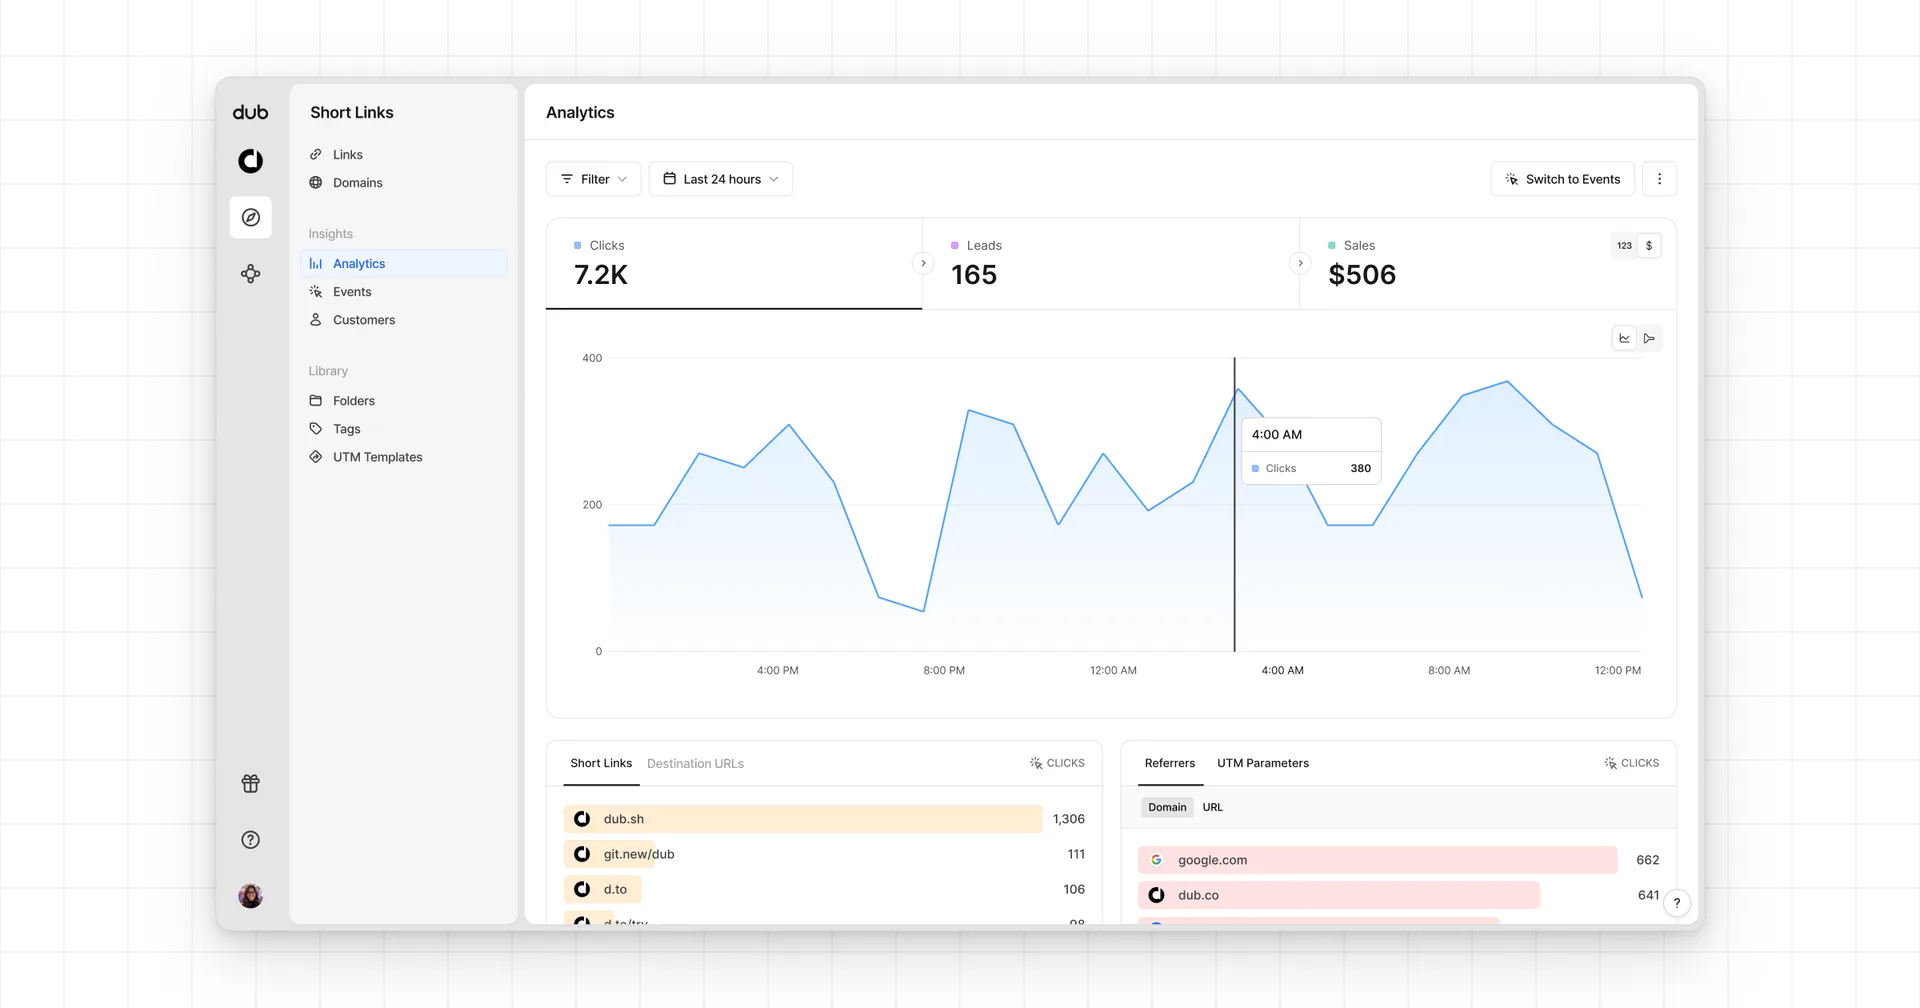
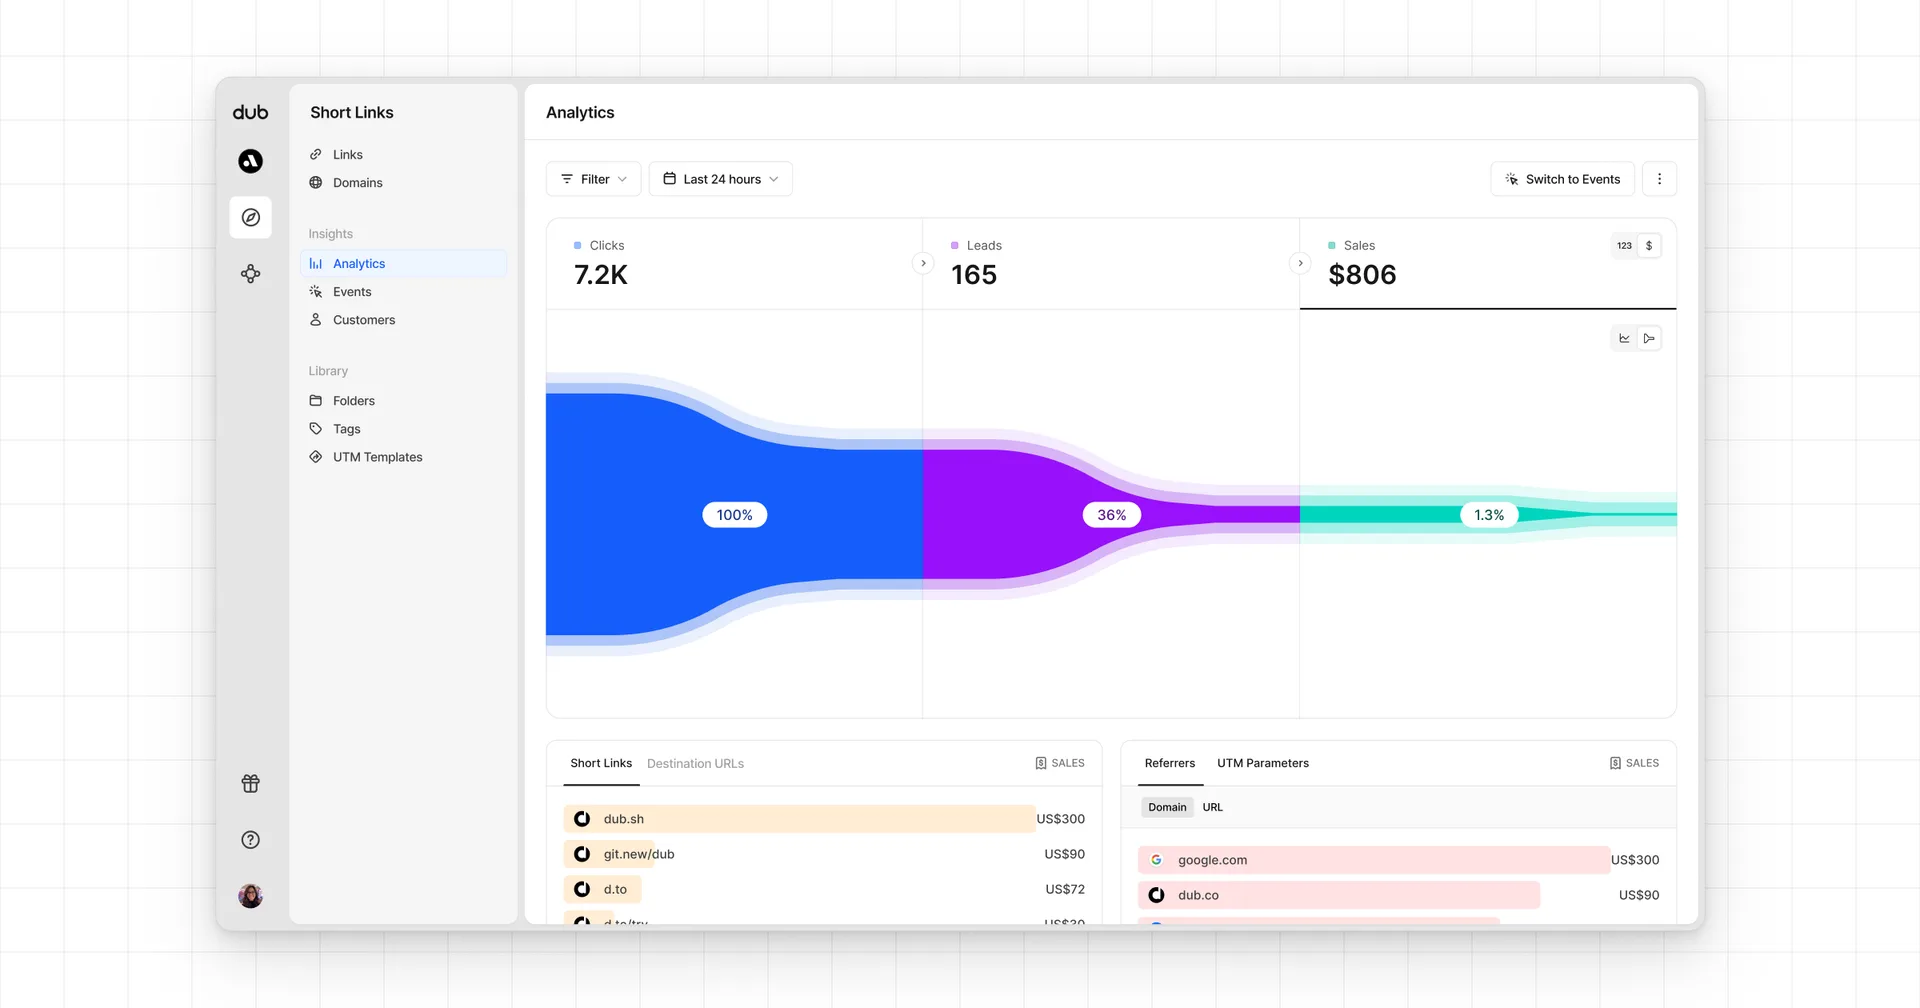
And that's it – you're all set! You can now sit back, relax, and watch your conversion revenue grow. We provide 3 different views to help you understand your conversions:
- Time-series: A time-series view of the number clicks, leads and sales.
- Funnel chart: A funnel chart view visualizing the conversion & dropoff rates across the different steps in the conversion funnel (clicks → leads → sales).
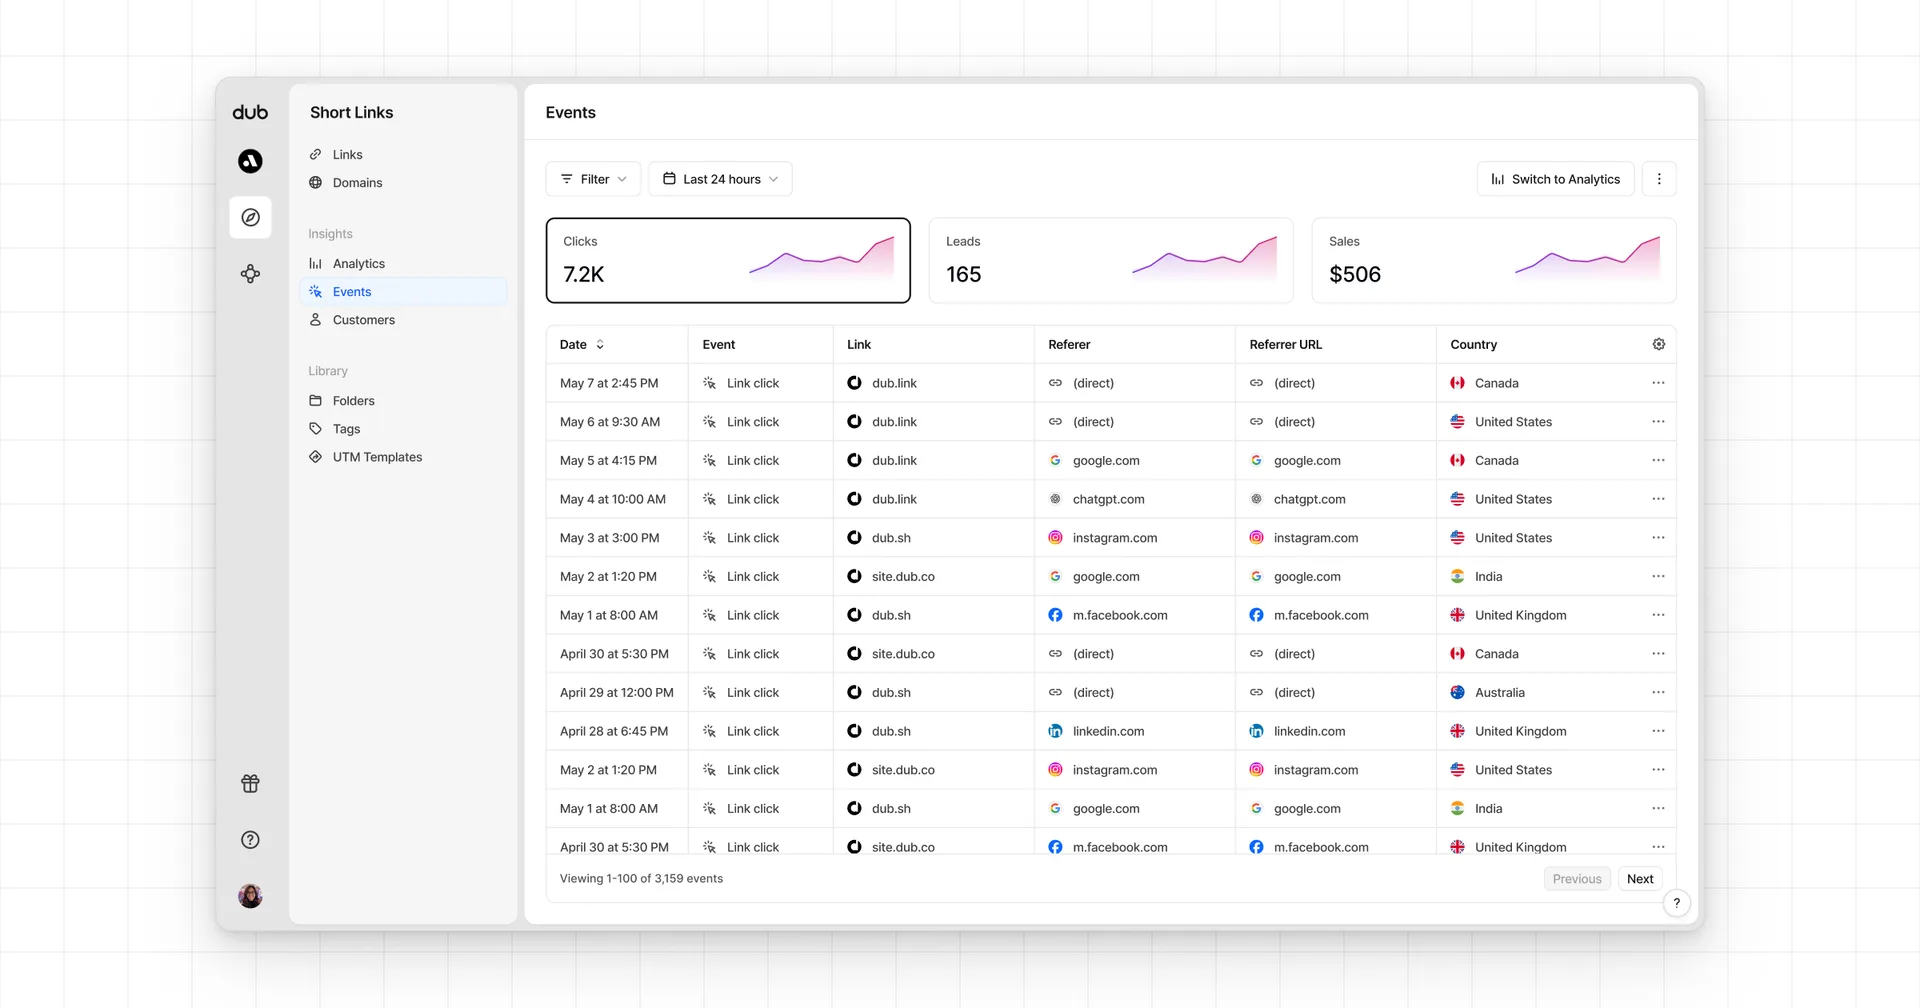
- Real-time events stream: A real-time events stream of every single conversion event that occurs across all your links in your workspace.